


Beskrivelse
🔇 Se hvordan vibrasjoner fjernes med ProSilence!
Denne korte videoen viser hvordan ProSilence-systemet kobler av og eliminerer uønsket vibrasjonsstøy. Klipsene er laget i samme spesialutviklede silica-gel som våre U-boats.
📄 Teknisk whitepaper
Last ned vår omfattende dokumentasjon laget av vår siv.ing. bygg Eivind Lygren:
👉 Klikk her for å laste ned whitepaper
Eivind Lygren, siv.ing. bygg
🧮 AutoCalc – Beregn materialbehov automatisk

AutoCalc hjelper deg å beregne alt du trenger for lydisolasjon 👉 Start beregning her
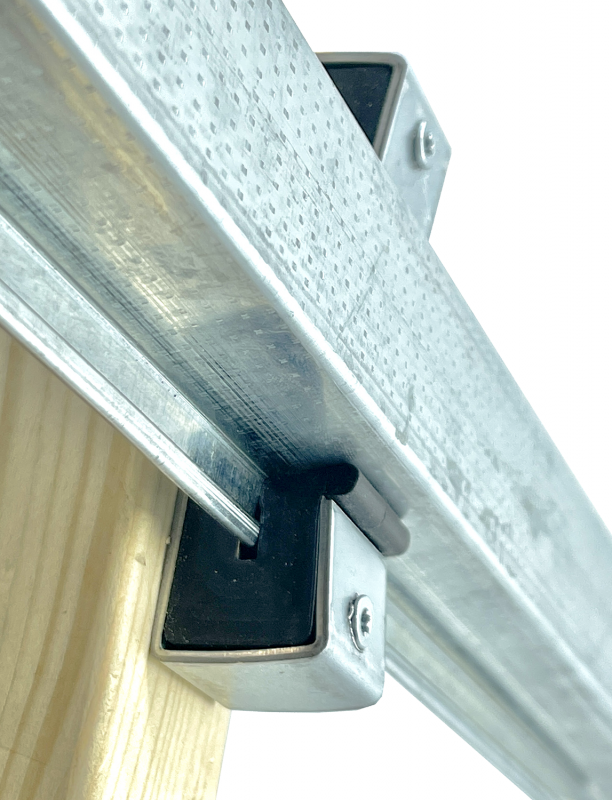
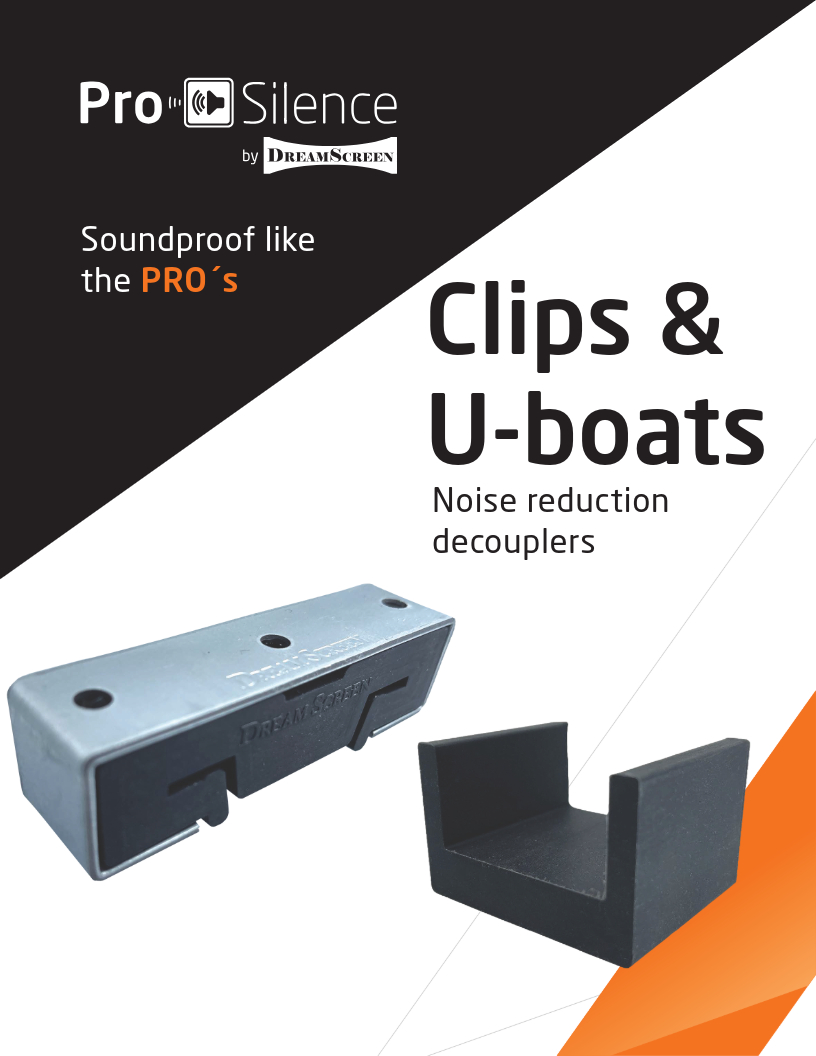
🌟 DreamScreen Black Avkoblingsclip 🌟
Perfekt for hjemmekino, studio, eller andre rom med behov for effektiv lydisolasjon. Denne nyutviklede avkoblingsclippen gir maksimal avkobling og brannsikkerhet – med kun 3,4 cm byggehøyde.
🔍 Hva er nytt?
- Ny proprietær gel for bedre lydisolasjon 🎶
- Forbedret brannsikkerhet og økt holdbarhet 🔥💪
- 2x bæreevne sammenlignet med tidligere versjon (v1) ✅
⚙️ Enkel montering
Monteres raskt både i tak og vegg. Fest ståldelen først, deretter gel-delen med stålstender. Husk å bruke tilpassede stålstendere under “Tilbehør”.
📌 Fordeler
- Kun 3,4 cm byggeutslag 📏
- Myk gel for maksimal vibrasjonsdemping
- Testet og branntrygg konstruksjon
- Lang levetid og enkel installasjon ⚡
🎯 Resultat: Stillere rom, bedre akustikk, og en mer profesjonell installasjon.
📎 Datablad
🎥 Ekstra video: Installasjon og prinsipp
🏭 Informasjon fra produsent
📥 Last ned brukerhåndbok i PDF
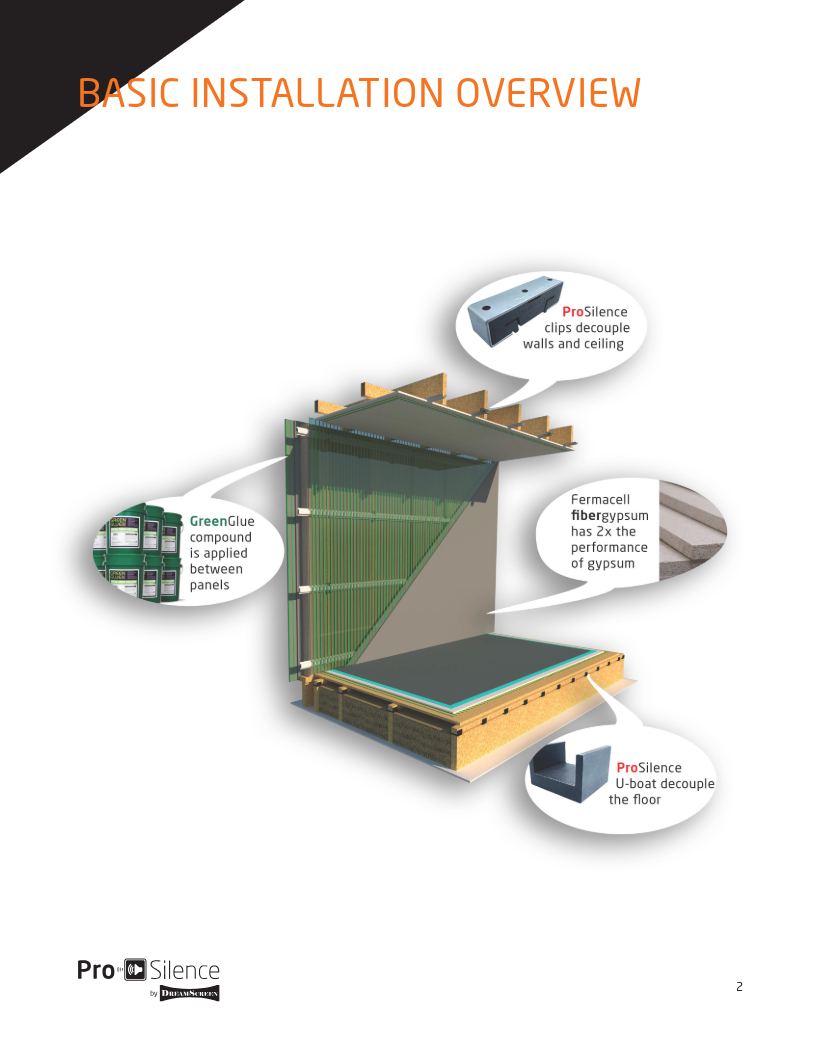
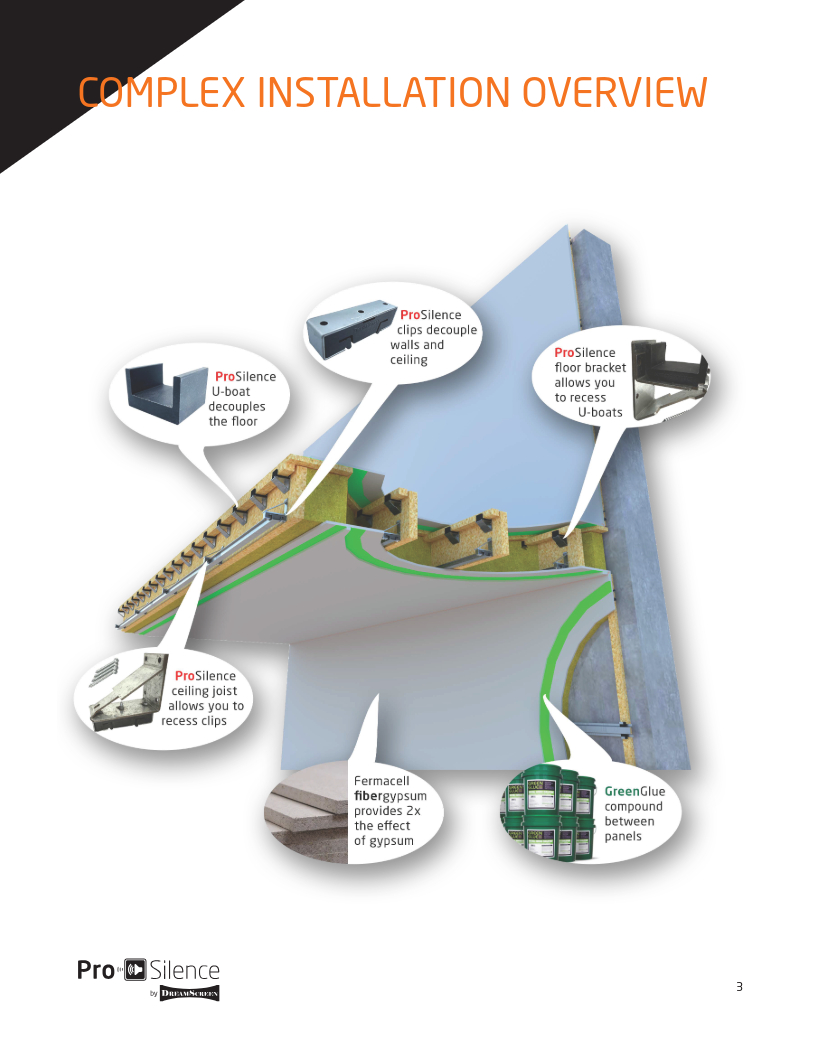
If you are looking for the best possible reduction of noise generated from your cinema room, recording studio, or similar, there is simply no way around decoupling the floor, walls, and ceiling.


Omtaler
Det er ingen omtaler ennå.